Introduction
Welcome to my entry into the Festive Tech Calendar 2021 “All I want for Christmas is…. budget LED video lighting”.
In this blog post I will walk through a budget LED video lighting option which can be controlled via automation. Like many of you I have been working from home, on many video calls and recording videos.
I wanted to improve the lighting for my camera and started to look into options.Initially I looked at the Elgato Key Lights which are fantastic bits of kit however I wanted to try out a cheaper alternative.
Equipment
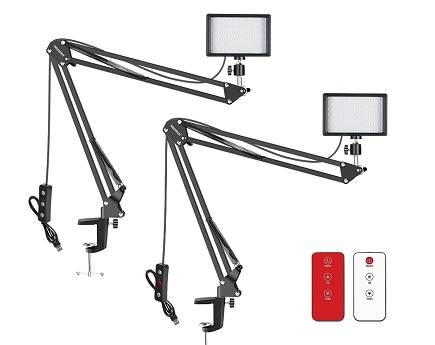
For the lighting itself, I have chosen the following 2 pack of lights from Neewer. An important piece here is that they include the option to be controlled via 433MHZ remote control for either on/off or brightness up/down.
Neewer 2 Packs Upgraded LED Video Light with 433MHZ Remote Control Kit
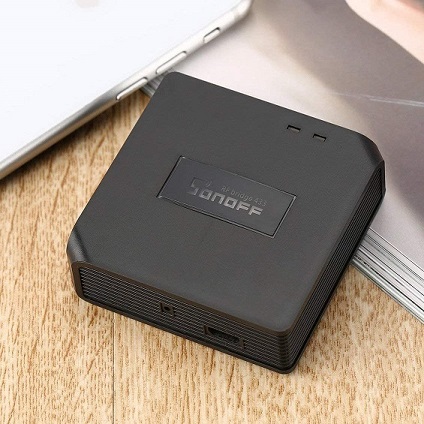
As the lights are able to be controlled using 433MHZ remote control, I also ordered the Sonoff RF Bridge. This allows you to send RF remote control signals to the lights via your network as opposed to the handheld remote controls included with the lights.
Sonoff RF Bridge Setup
Power up your lights and unpack the RF bridge (but don’t plug it in quite yet!).
The Sonoff RF Bridge setup works in conjunction with the eWeLink app for Apple or Android. You can search for ‘eWeLink’ in either the Apple App store or the Google Play store to find and install it.
Apple App store: https://apps.apple.com/us/app/ewelink-smart-home/id1035163158M
Google Play store: https://play.google.com/store/apps/details?id=com.coolkit&hl=en_US&gl=US
Once the app has been installed, you will be asked to create a login. Remember your login email and password!
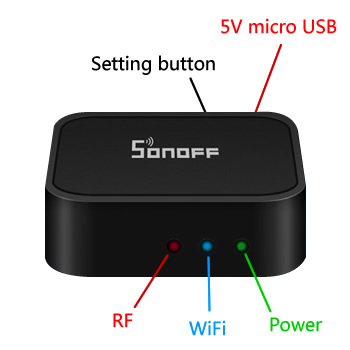
Once you have your eWeLink app working. Power up the RF Bridge with a micro USB cable. The green led will light up. Enter into pairing status: Use a screwdriver or pen to press and hold the pairing button for 7s until the blue led fast blinks 3 time and repeats.

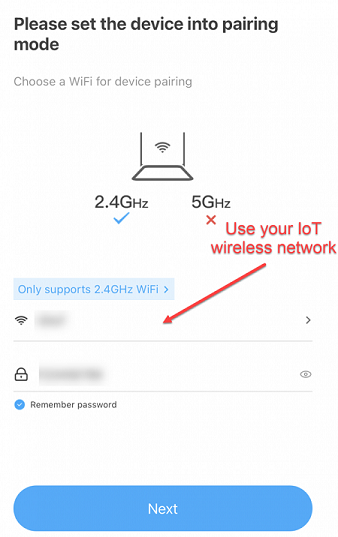
Before you add the device, you’re also going to want to ensure that your phone is on the correct wireless network for your IoT devices. If you have a separate IoT network, connect to it now before adoption so that the RF Bridge ends up in the correct network.
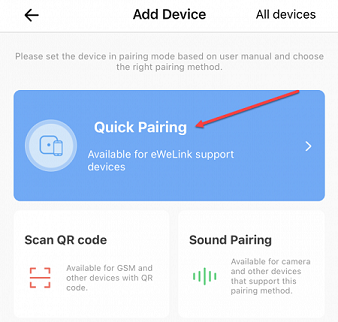
Click the + sign at the bottom of the eWeLink app to add a new device, and then choose Quick Pairing.
Then select Add one device
On the next screen, select your WiFi network and enter in the password – click Next.
Place your phone near the RF Bridge, and you should see it start to adopt. Mine took about 20 seconds, and then I received the Device added successfully screen. Give your device a useful name (you can change this later) and then click ‘Done’ and you will get a notice that your device is connecting to WiFi and it may take a few mins to get online.
Once the RF Bridge is online, the LED on the top side of the RF Bridge will be solid blue, and it will show up in the eWeLink app.
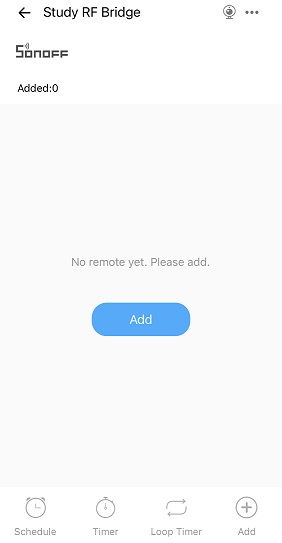
Now that we have our RF Bridge showing up in the eWeLink app, it’s time to add the first remote control for the Neweer lights.
Press Add
Select 3-button then press Save
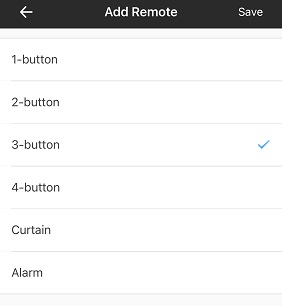
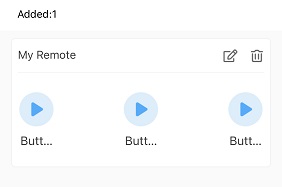
Once you click Save you’ll hear a little ‘beep’ from the RF Bridge. You now have 60 seconds to press a button on the RF remote – I’m going to press On/Off first. You should hear 2 beeps from the RF Bridge indicating that it received the On/Off RF signal. (You may have to press and hold the button a few times to get it to register)

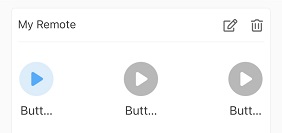
After the 2 beeps, eWeLink redirects you to the RF Bridge detail page, and you should now see a new My Remote section with 3 buttons (only one of the buttons will show blue since we have only programmed one of the buttons so far)
Hold down on the on the 2nd remote button in the app to add the Up remote function and repeat the process above this time to pair the Up button.
Repeat again for the 3rd remote button in the app to add the Down remote function.
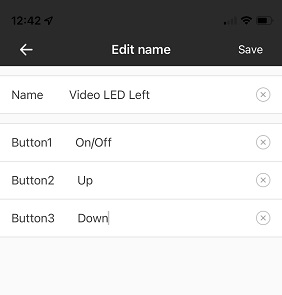
Once you have added the 3 remote buttons as buttons paired into the app for the first remote control click on the pencil icon to rename the remote and buttons within the app.
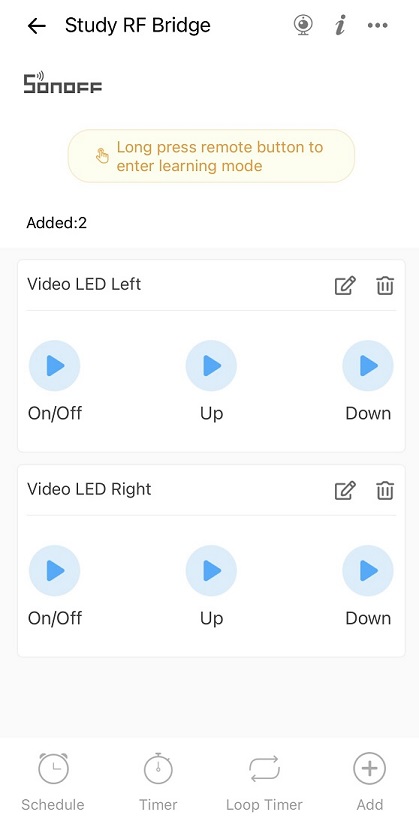
Repeat the Add process for the 2nd remote control included within the Neweer kit.
Once you have added and paired both remotes and buttons into the app you can now control both of the LED video lights via the eWeLink mobile app.
In the next section we will look at how to extend this integration into IFTTT.
Control via IFTTT and Stream Deck (or webhook)
Integrating your LED lights and the RF Bridge with IFTTT unlocks further capabilities and a whole host of integrations out of the box. Or even simply offers the ability to present a webhook control to your lighting if you are planning to build some custom automation.
In my case I am using an Elgato Streamdeck and want to be able to press a button on the Streamdeck to control the lights.
Head over to https://ifttt.com
If you already have an account login or if you have never used IFTTT go ahead and create a new account. I am using an IFTTT Pro account (£3.80 per month) as this offers more applets and also faster response times.
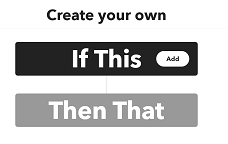
Press Create
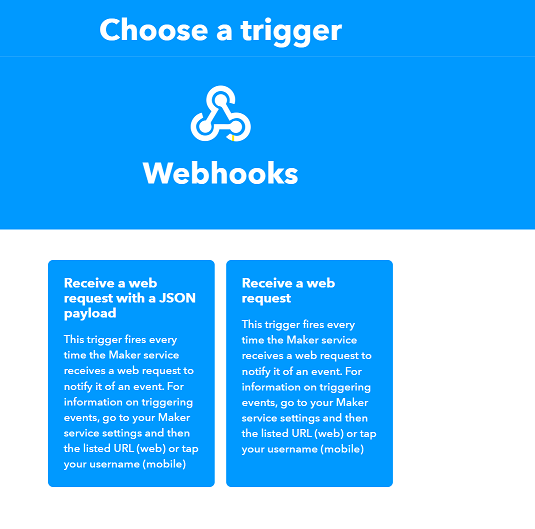
Next to If This, press Add.
Search for Webhooks then select Receive a web request
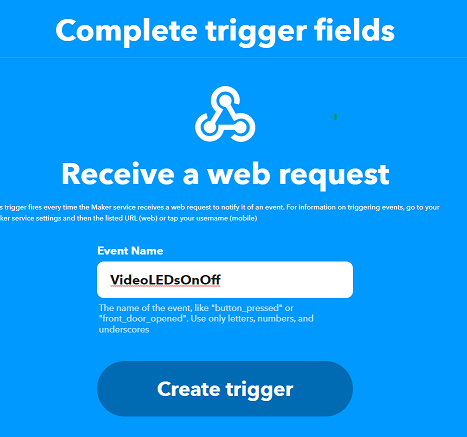
Give the event a title, in my case I will call it VideoLEDsOnOff. Now press Create trigger.
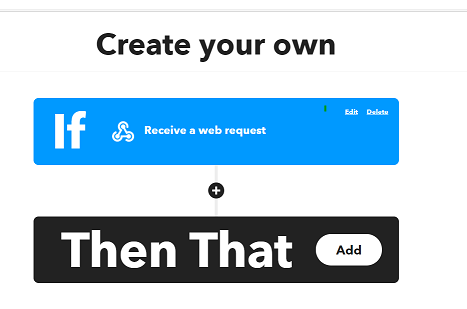
Next to Then That, press Add
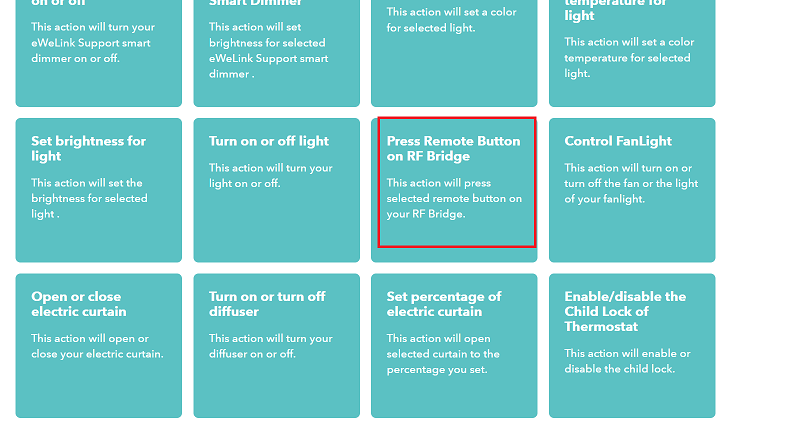
Search for eWeLink Smart Home and select it. (Follow steps to login to your eweLink account if required)
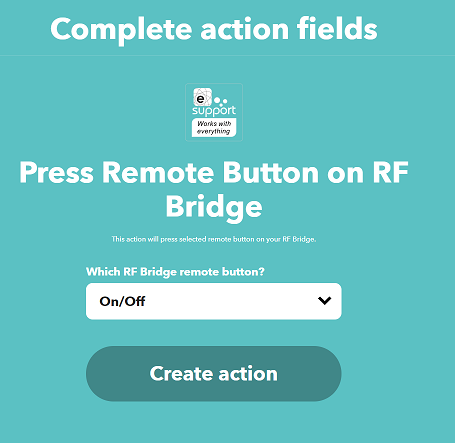
Now look for Press Remote Button on RF Bridge and select this action.
Choose the On/Off button on our second remote then press Create action
Press the + sign below Then and repeat but this time select the On/Off button on your second remote.
Once you have added both remote buttons you will be presented with this screen.
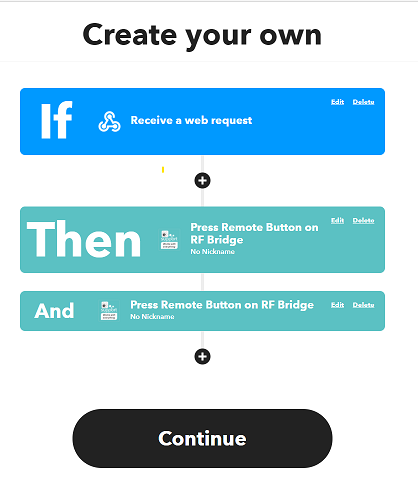
Press Continue, enter a name for your applet then press Finish
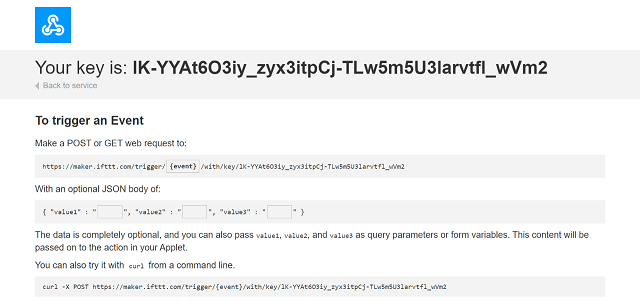
Now visit the IFTTT Webhooks Page https://ifttt.com/maker_webhooks and click on the Documentation button to get your IFTTT webhook key.
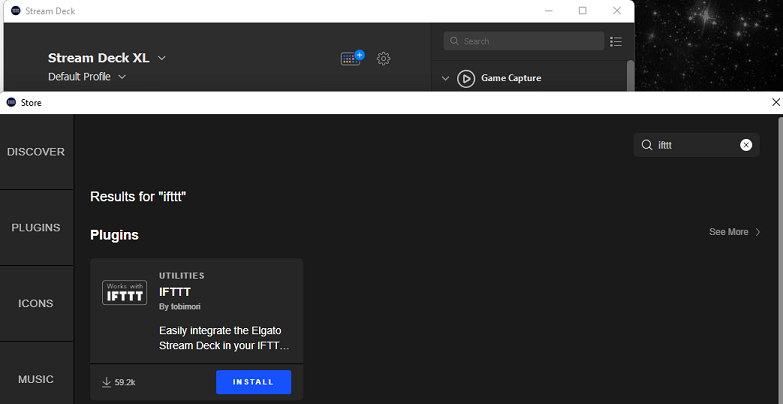
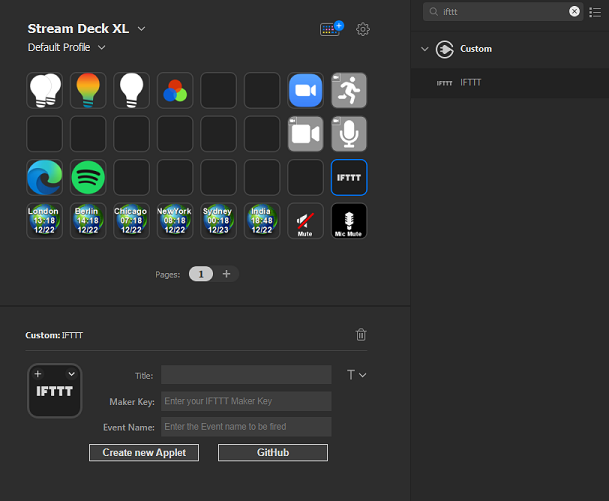
I have an Elgato Stream Deck so in this example I am going to add the IFTT plug in and an action for on/off onto my deck.
Launch your Stream Deck control software, select the store and search for the IFTTT plugin. Press Install.
Once installed, drag and drop an IFTTT action onto a button on the streamdeck.
Enter a title for your button if desired. Insert your Maker Key we obtained from IFTTT earlier and under Event Name enter the webhook name we also created earlier, for example in my instance VideoLEDsOnOff
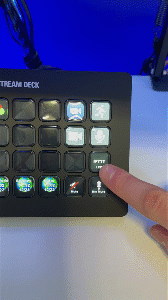
At this point I now have a working button on my Stream Deck which will turn on or off my LED video lights. You can extend this further if you wish by repeating the steps above for example if you wanted a buttton to adjust brightness of the lights up/down.
If you aren’t fortunate enough to have a Stream Deck you can use a webhook or other action/integration to control the lights…
There are many possibilities with other integrations using IFTT - https://ifttt.com/explore
Alternatively you can use other home automation platforms such as Home Assistant integration to Sonoff and the Home Assistant Streamdeck integration.
Please do check out the other blog posts, live streams and videos from the Festive Tech Calendar 2021 which is packed full of fantastic content! This year the Festive Tech Calendar Team are raising money for the charity @girlswhocode, if you found this post useful or just want to donate head over to the Just Giving Page.